Quick-start guide
Trying out AirLink is easy
-
Download two Android app APK files and install on two smartphones
- one acting as device - on a phone with Android 9 or lower - and
- one acting as the actual AirLink smartphone gateway - tested upto Android 11
- Request the Demo tenant server login from EnAccess,
and you have the three components needed -Device, App and Server- to try AirLink quickly without buying any hardware! Check out this video for more -
Who Is AirLink for?
AirLink is a ready-made protocol and software backend for businesses who want to enable Pay as you go control and data on their products using a smartphones as a gateway; either because the end product e.g. a home light does not have a remote control or GSM based pay as you go built in, or because adding a smartphone to your product offering adds significant value to your customers.
AirLink is also for businesses who want their products secured against loss or theft using crowd-sourced ‘pings’ via everyone else who uses AirLink devices.
Components
- Server: EnAccess.org runs a multi-tenant AirLink server for early adopters and people who want to try out airlink - you can subscribe to as a tenant
- Get a tenant login from EnAccess via an email request or use the Demo tenant to try out AirLink (contact EnAccess for login)
- Optional: Get your own thingsboard.io server configured to support AirLink using the JSON files available on AirLink Server Github page, then you don’t need the EnAccess server.
- PAYG Devices: Get AirLink Devices
- Use a smartphone with the ‘AirLink Device Emulator’ app from the AirLink Devices repository to get started and test airlink without requiring any hardware!
- Find Suppliers or make your own Bluetooth hardware that is compatible with the AirLink Devices spec. Use the example firmware available for Nordic BLE products on the AirLink Devices Github library
- If you want to re-brand the devices that you sell, register with Bluetooth SIG, create a declaration for your product, and use ID text they provide as the 'advertisement' manufacturer text in the Bluetooth advertisement
- Smartphone: Get an Android phone and install the Airlink App!
- Follow the steps in the next section to setup your AirLink Server tenant
- Scan the device via the app and see if it registers on the server
- API: Use a third party business application to automate device on/off e.g. Solaris via API calls to the AirLink server
- Develop your business integrations further by building on the open source app for clients or API integrations with the IoT server
- Don't forget to integrate with the EnAccess server for the inter-company, crowdsourced 'Neighborhood Watch' (lost assets database)
How to get started with your own AirLink deployment
Once you decide to try your own AirLink deployment and obtain a login from EnAccess on the managed demo server which can handle startup-scale IoT traffic (the fastest way to get your own AirLink deployment going), or setup your own Thingsboard.io server, here is a step by step setup for your tenant login in the AirLink server.
A video playlist for setting up AirLink start to end
In short, you will first setup the server, then connect the AirLink App to the server, provision a device using the App, setup data sychronization, and finally generate a Pay as you go token for the airlink device. Here are the steps in detail:
-
Assumption: You have a “Tenant Administrator” email login provided by EnAccess, or one that you made for your own server. Login with this administrator account. Steps 2-5 are also covered in this video:
-
Go to Users → Tenant Users, click on the + sign at the the top right of the page to create a new Tenant User. If activating by displaying activation link, note down the email and password. Note that the AirLink app uses this login information for administrative actions like registering devices via Oauth, whereas device data exchange is done using access tokens.
-
Setup Device Profiles
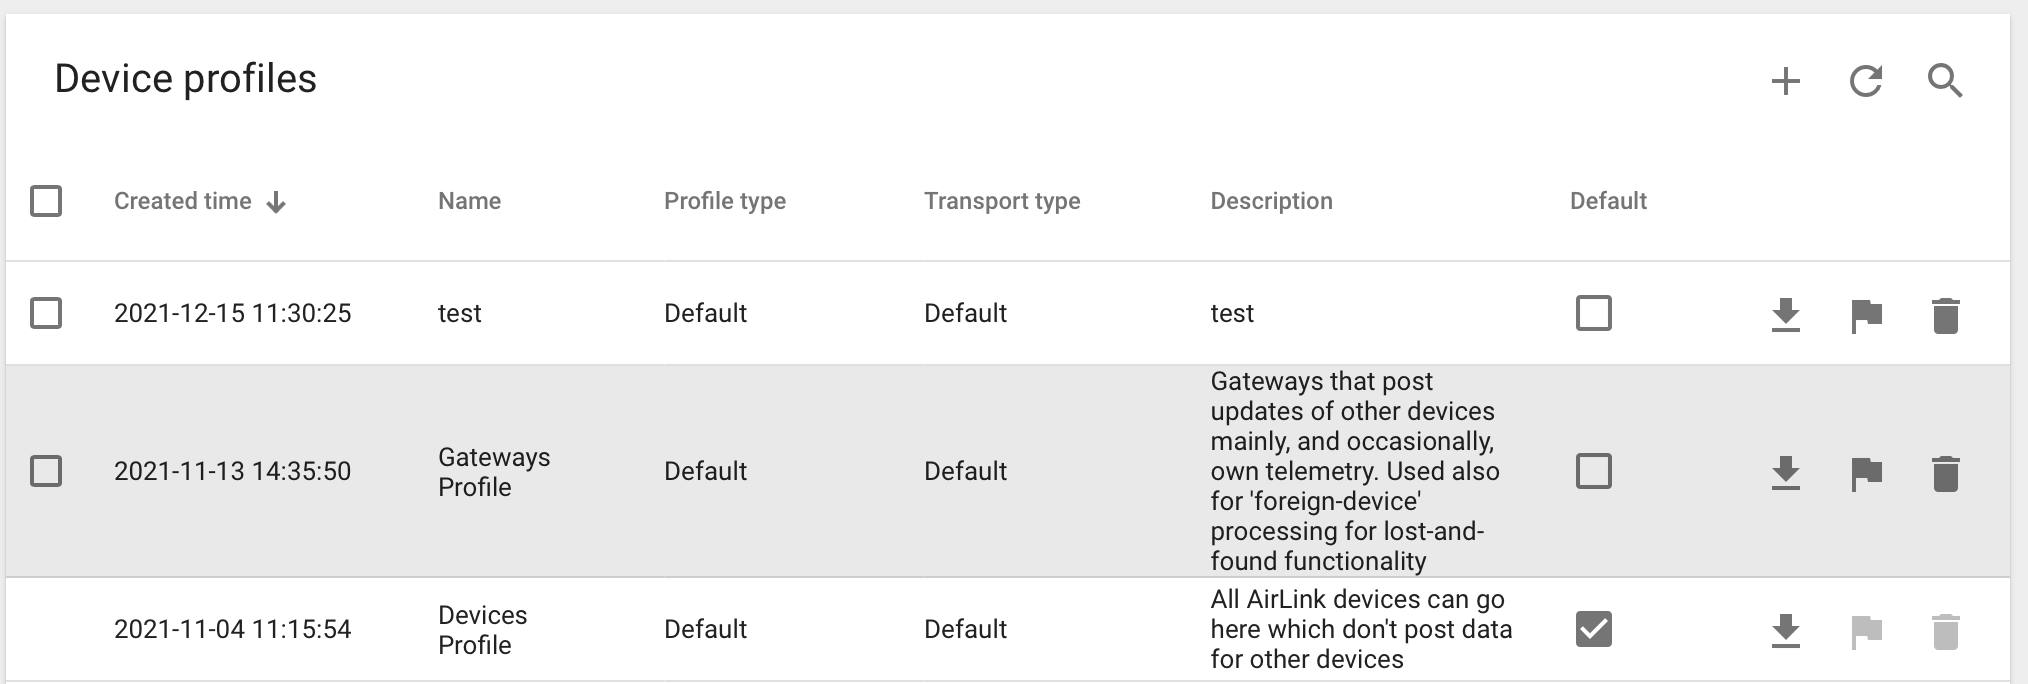
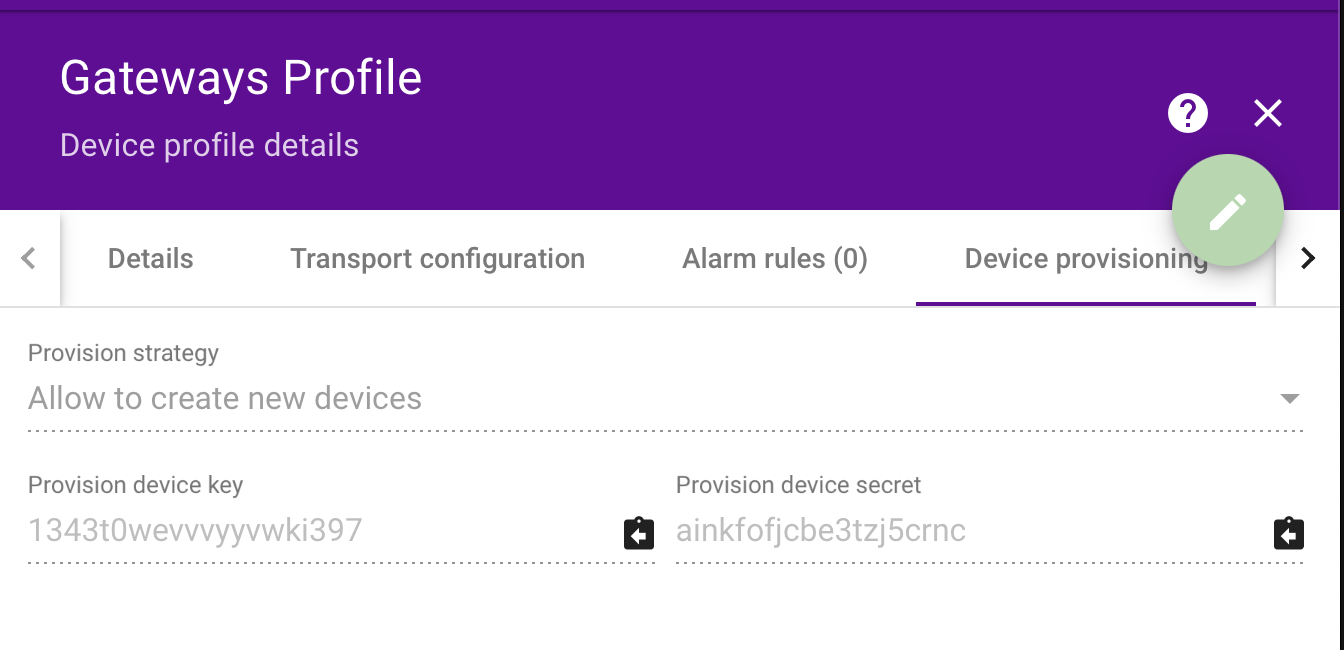
- Setup a “Gateways” profile and enable the “Allow provisioning...” option. To do this, you need to tap the pencil button and then remember to save by pressing the tick-mark button.
- Setup a “Devices” Profile, and enable the “Default” checkbox as in the figure above. Also enable the “Allow provisioning...” option as in the previous step
- Copy the Provisioning Keys and Secrets, you will need to input these in the AirLink app!
- Setup a “Gateways” profile and enable the “Allow provisioning...” option. To do this, you need to tap the pencil button and then remember to save by pressing the tick-mark button.
-
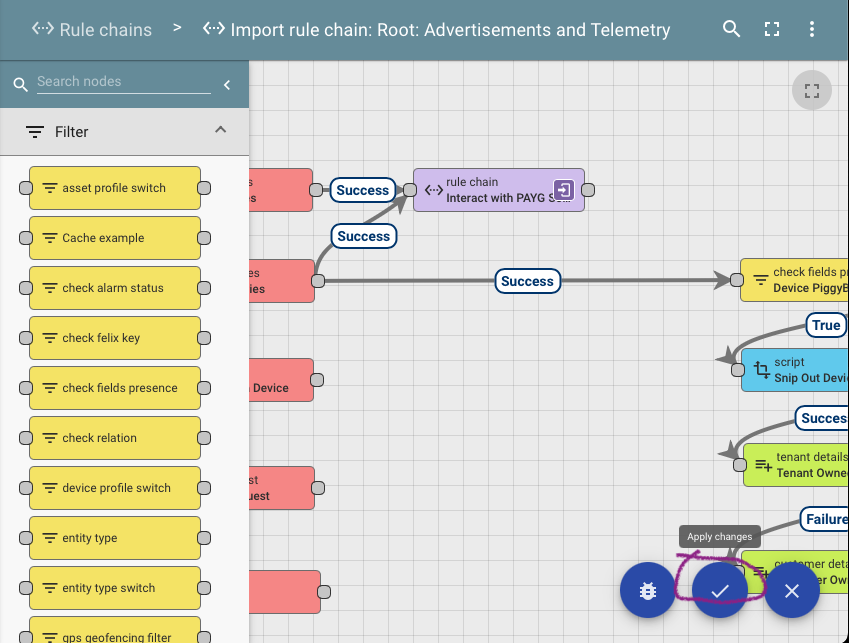
Import the rule chains: All data that flows to the thingsboard server goes to the root rule chain, and any other rule chain that the root chain hands off to. To process AirLink data, we created two rule chains saved as .json files in the AirLink Server repository. This is where to find the Rule chains, just below the Home icon.
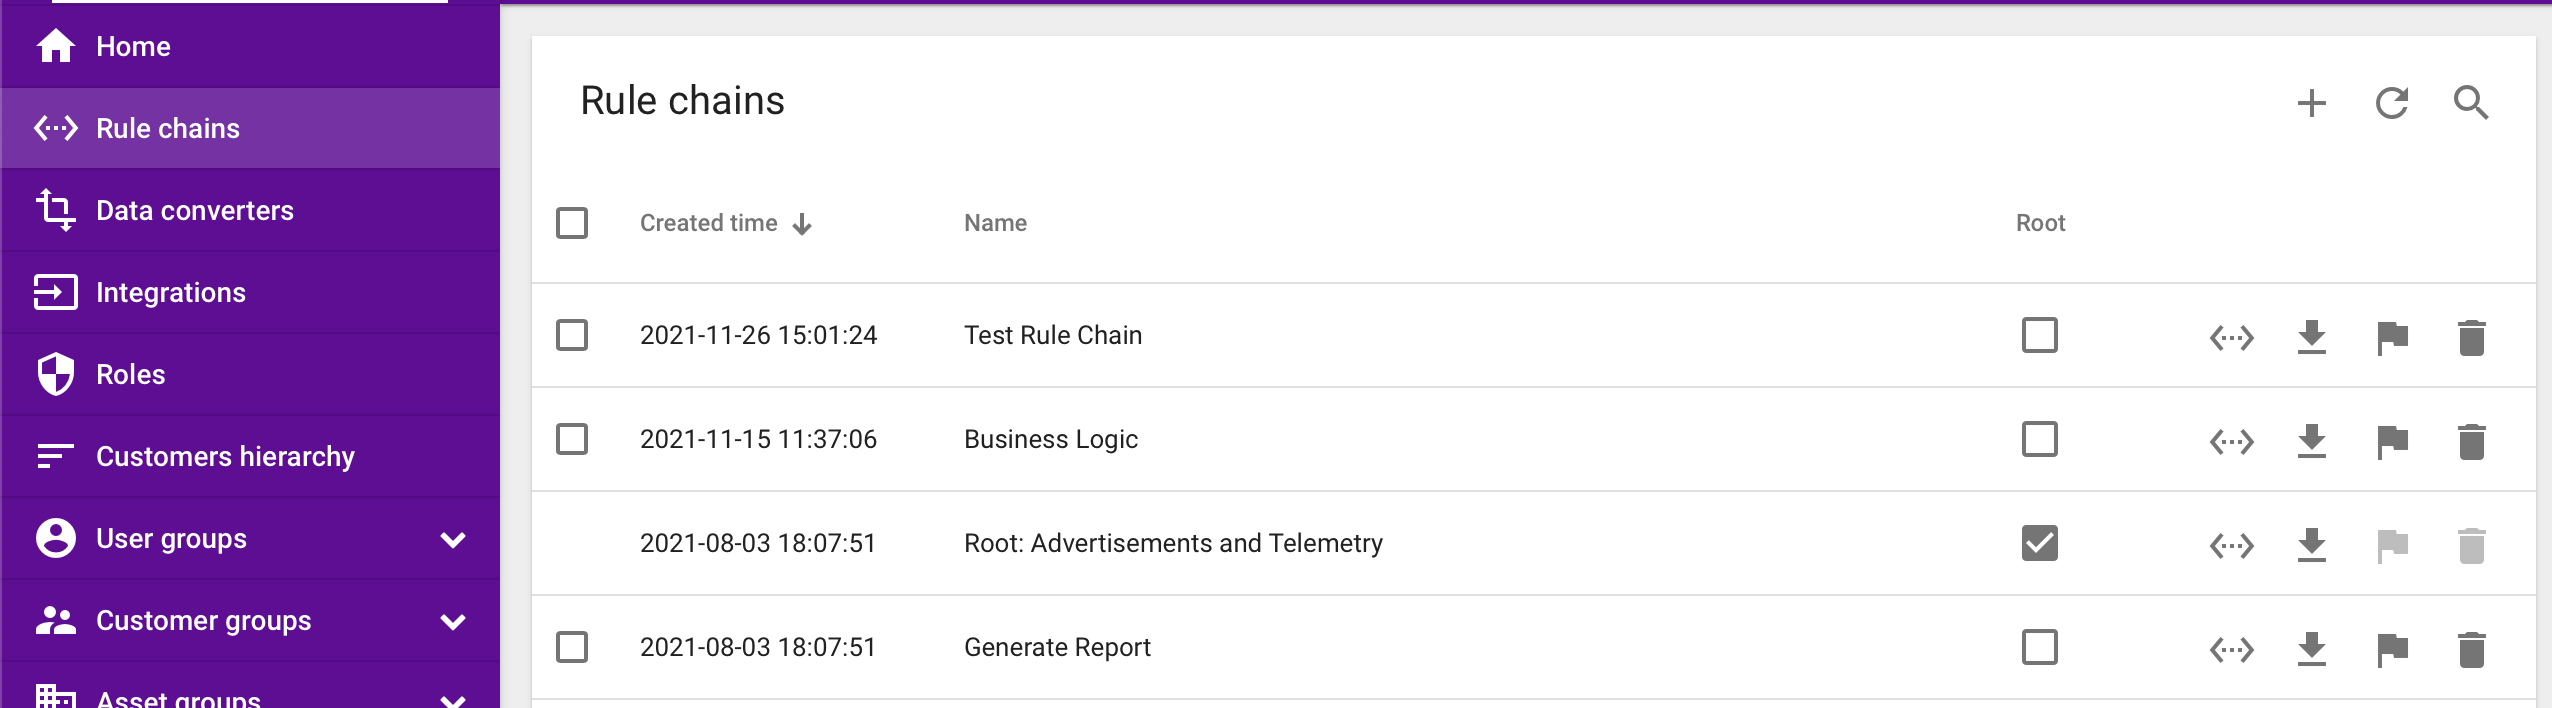
- Make sure to import the lowest level rule chains first by following this order in Rule Chain → + → Import Rule Chain:
-
“Interact with other PAYG Software Providers” - click save

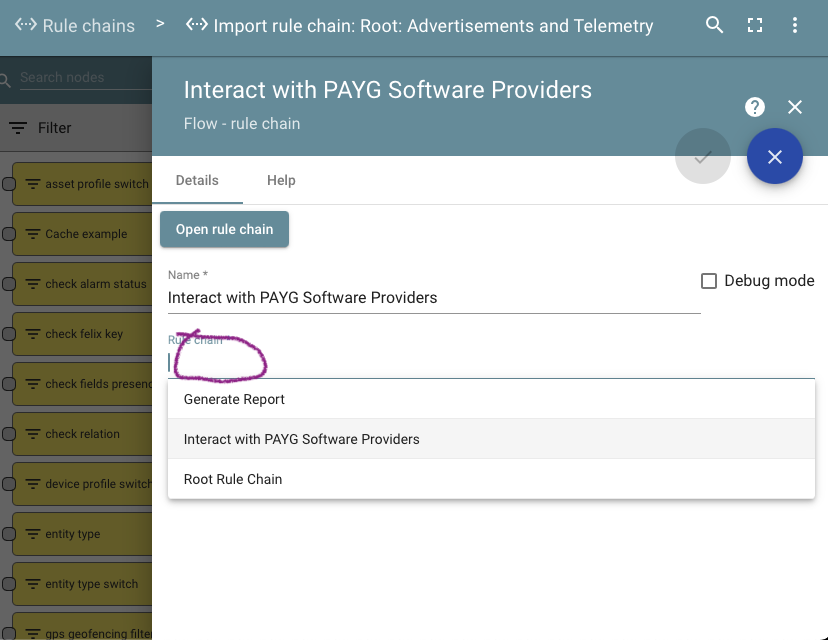
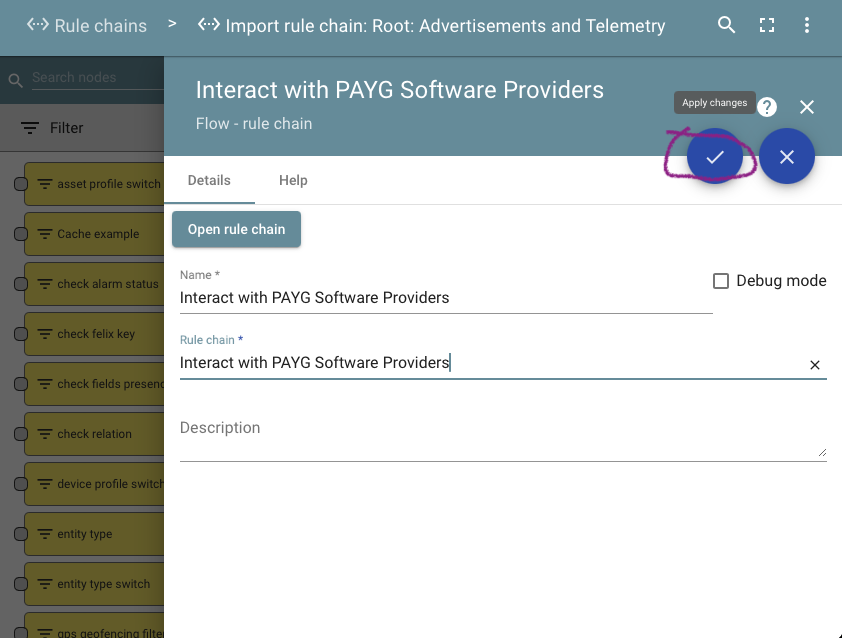
 2. “Root Advertisements and Telemetry” - edit the link to the Interact with other PAYG Software Providers rule chain, then click save
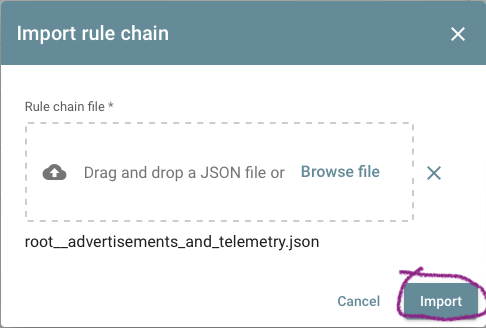
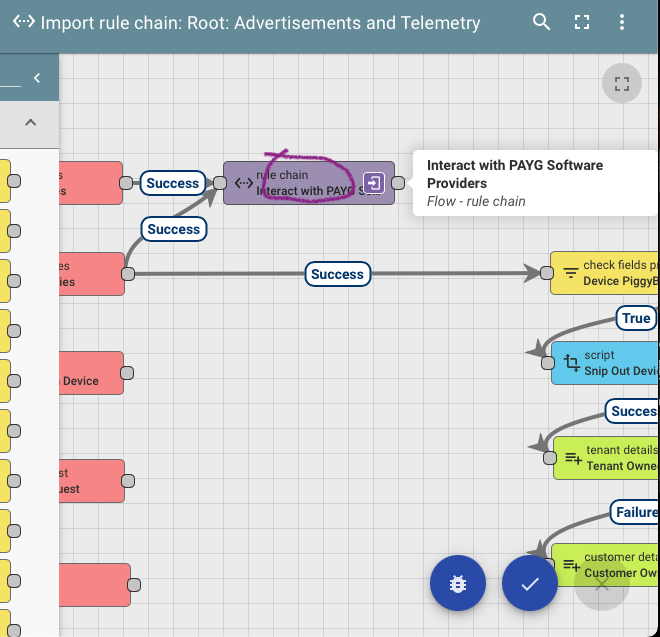
 3. Mark the “Root Advertisements and Telemetry” rule chain as “Root” using the Flag icon next to it
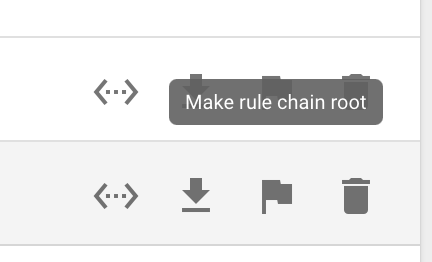
-
- Make sure to import the lowest level rule chains first by following this order in Rule Chain → + → Import Rule Chain:
-
That’s it for the minimum required configuration on the Server! Next, configure your AirLink App to talk to your server per the following video, and you are set to provision and test real devices!
-
After registering a device using the above flow, you can generate a Nexus Keycode PAYG token for it by using the Postman collection in the AirLink-Server repository. or the built-in functionality in the Gateway App:
- Download both the API calls collection and the environment, and upload to your Postman (getpostman.com)
- First use the login flow with the Tenant User username/password of the demo user to authenticate and get a JWT token, then
- enter the JWT token into the Airlink environment current value
- Use the Generate Token flow with the correct device ID to generate a Nexus Keycode PAYG token for your device. This token will be automatically saved in the device properties as well
- Connect the AirLink App and type the token in manually into the PC resource, or via keypad as shown in the video above
-
If you are connecting to one of the supported built-in integrations - Solaris Or Angaza, follow this guide to connect AirLink devices to those software stacks: Connecting to other PAYGO software providers