AirLink PAYGO Options: Built-in, Solaris or Angaza
AirLink acts as an IoT hub, allowing connections to Solaris / Angaza out of the box. Whether AirLink devices connect via Bluetooth or GSM to the AirLink server, the server can be told the device type as Solaris and Angaza, in which case it looks for PAYGo Tokens on the respective servers using login credentials provided to it. All three functionalities are enabled automatically when the AirLink Server tenant has all the rule chain .json files from the Server repository loaded in the right sequence with the lowest level in the hierarchy first, as detailed in the Quick-start guide.
A manufacturer or distributor may in this way add AirLink devices to existing Angaza or Solaris software stacks, enabling a new customer experience where tokens are automatically entered via:
- a paired smartphone or a device acting as the AirLink GSM/Bluetooth gateway OR
- a bluetooth remote control authenticated with one or more target devices
The AirLink app can transfer any type of PAYGO token between the server and device. Consequently, the IoT hub can hold a mix of devices configured to different providers, of which the following are supported as of this writing. The key is uploading the device list with the correct payg_type to the server before syncing via the phone app, using the bulk device upload flow.
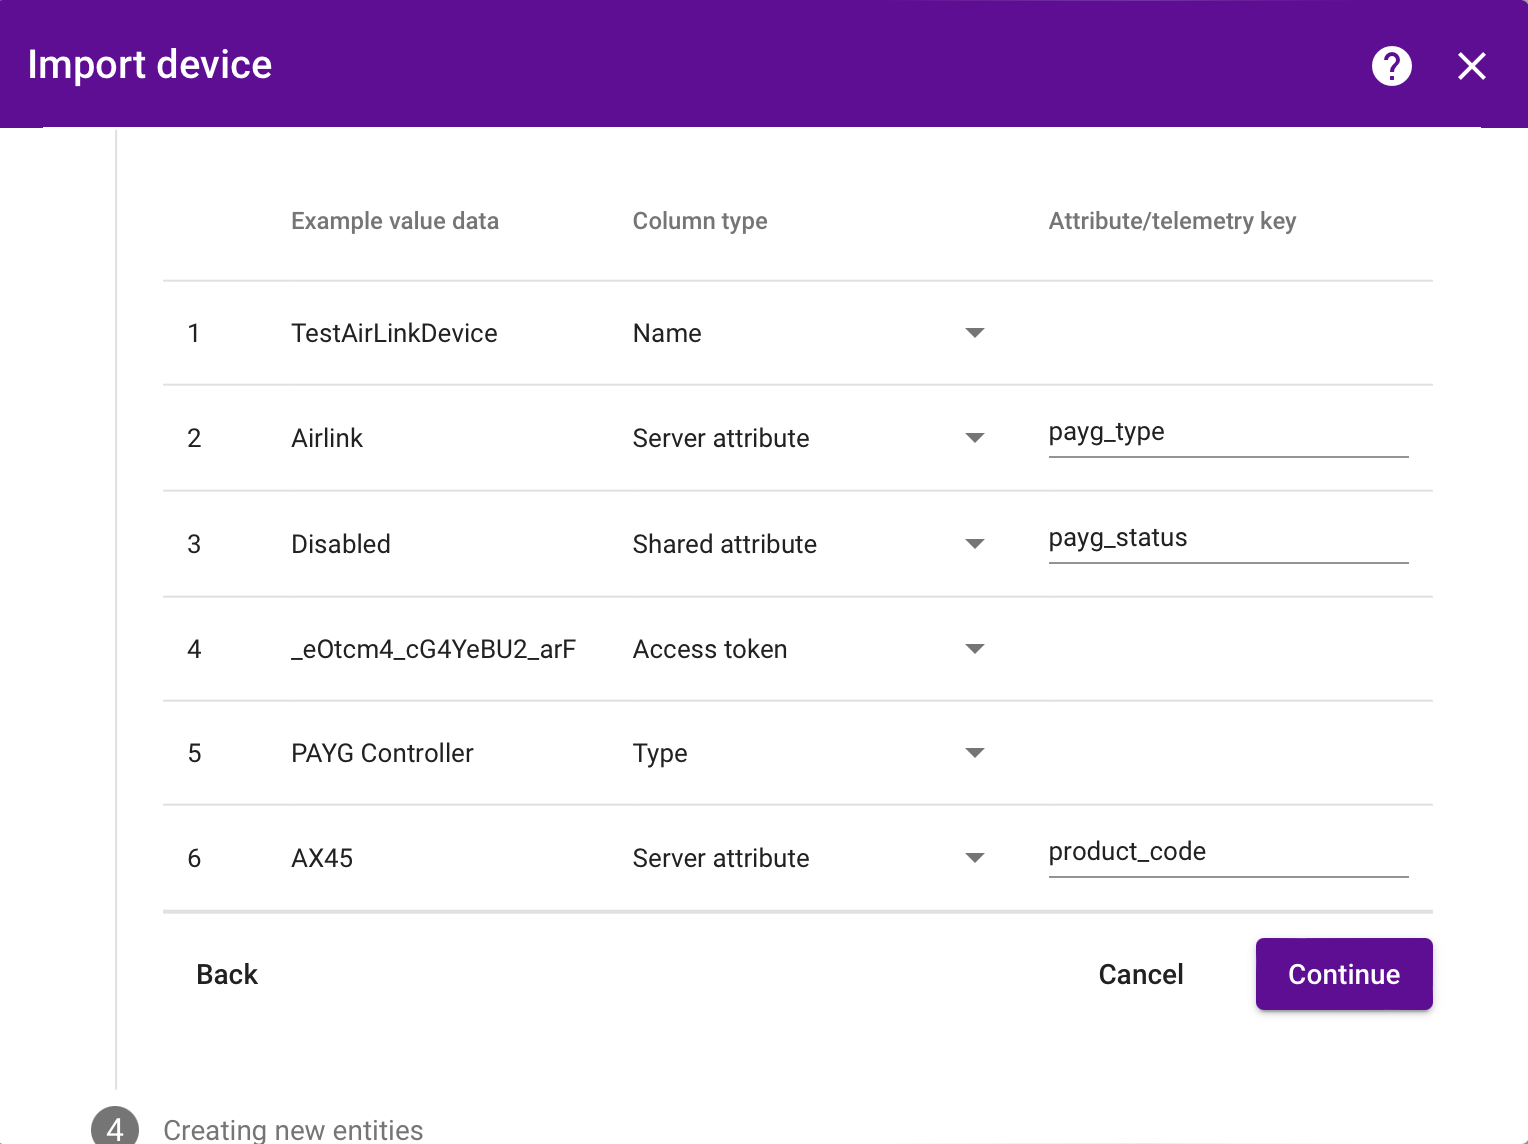
The CSV format for each type is in the sections below, and the upload dialog should look like this - please make sure to specify each Column type manually as a Name, Type, Access Token, Server attribute or Shared attribute (the original file's column names are used in the Attribute/telemetry key column as the key name when the column type is a type of attribute, otherwise they are hidden in this screenshot).
Out-of-the-box PAYGO Token functionality
AirLink natively generates Nexus Tokens which the AirLink open-source firmware natively consumes. This means that an AirLink adopter can connect their own software stack to AirLink to enable a PAYGo business case by leaving the technical bits of hardware PAYGo functionality to AirLink. This is the process outlined in the Quick-start guide, Step 6.
The API requests to generate these tokens are available in the Postman Collection and the related Postman Environment, and are the default setup for new AirLink Devices provisioned via the AirLink App.
When adding devices manually, make sure to add devices with the payg_type property set to "Airlink", as in the following CSV file format useful for bulk devices upload: TestAirLinkDevices.csv
Most PAYGO distributors however don't have their own software stacks. For this purpose, AirLink also provides connectivity to a couple established stacks who share API, Solaris PAYGOPS and Angaza.
Make sure to follow the server setup fully and setup your credentials before adding devices, as shown as part of the video in the tenant configuration section in Quick-start guide
Solaris OpenPAYGO Tokens and Telemetry
To use AirLink with Solaris, you will need an account with Solaris that allows API access and ask for credentials. AirLink supports telemetry update from device to Solaris server - any property sent from the device will be forwarded, and token updates from Solaris Server to device are supported by the App. In general, as long as the provisioning step is done right and the device generates any data, the flow should work transparently as for any other AirLink device.
Note that requests for new PAYG credit/tokens are done to the Solaris platform in this case and AirLink only supports synchronizing with the devices.
The process for setting up PAYG devices is shown in the following video:
-
Credentials: For simplicity, the authentication token required for a particular Solaris account's API access have been added to the json of the Solaris rule chain (the GitHub file has the development account token that need to be replaced with your own Solaris account's token). Before uploading the Solaris rule chain json file, open it in a text editor and look for OPGMServerToken, then replace the value in quotes (starting with eyJ... and ending with ...WEY in the example) with the value provided by Solaris -
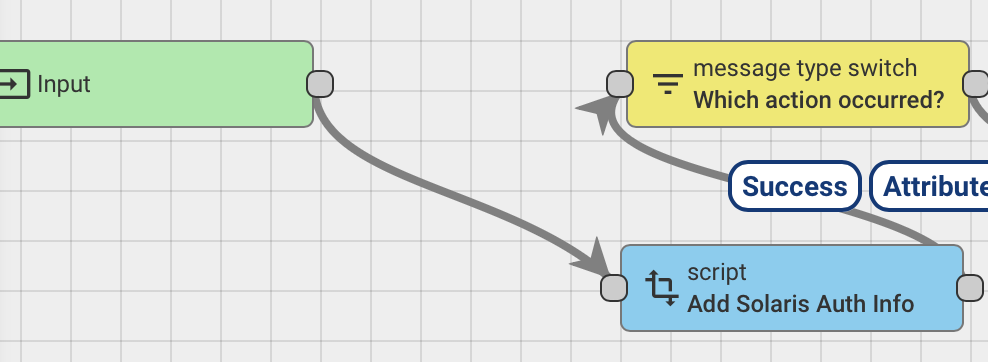
metadata.OPGMServerToken = \"eyJ0eXAiOiJKV1QiLCJhbGciOiJIUzI1NiJ9.eyJpc3MiOiJTb2xhcmlzIE9mZmdyaWQiLCJleHAiOjI2Njc0OTQxMjEsImlhdCI6MTY2NzQ5NDEyMiwic3ViIjo1MiwicGVybWlzc2lvbnMiOlsiVmlld0RldmljZXMiLCJFZGl0RGV2aWNlcyIsIlVubG9ja0RldmljZXMiLCJMaXN0TWV0cmljcyIsIlZpZXdNZXRyaWNzIiwiQWRkTWV0cmljcyIsIkVkaXRNZXRyaWNzIiwiRGVsZXRlTWV0cmljcyIsIlZpZXdTeW5jQXR0ZW1wdHMiLCJBZGRTeW5jQXR0ZW1wdHMiXX0.Dw9oSCdyaNfnn_puen0O7uUX3lfu-hKMHxh71xYUWEY\"It can also be edited after installation to your tenant by opening the "Add Solaris Auth Info" module in the Solaris rule chain from the server UI.
Note: Only one Solaris credential set is supported out of the box, which means that the functionality is most suited to distributors rather than manufacturers. Further development of the AirLink server is possible to support multiple Solaris credentials based on device group. 2. Provisioning Solaris Devices: To add Solaris devices, you will need to provision them both in the Solaris PAYGOPS platform as well as in AirLink separately.
- To provision a single device to AirLink after adding it's details to the Solaris platform, use the AirLink App to provision the device and select payg_type as Solaris and Label as the serial number entered into the Solaris platform for that device.
 2. To provision devices in AirLink in bulk to connect to Solaris servers for PAYGO Tokens, use the format while uploading new devices in the following CSV File:
 -
PAYGO Tokens: Solaris makes tokens available each time telemetry data is posted to the server. For this reason, the AirLink server expects any property to be updated for a Solaris device, upon which it will automatically download the latest token provided by the Solaris server. This token can then be pulled to the device using a 'GET' equivalent command for the pc_tkn property. Note that the demo app can do this automatically.
- Telemetry Data: Solaris servers provide a single POST-response method for posting data as well as getting tokens. When the AirLink server receives telemetry or attribute updates from a devices with the payg_type set to Solaris, it automatically forwards the telemetry data in the proper format to the Solaris servers, saving the latest token from the response.
Angaza Nexus Channel and automatic device provisioning
To use AirLink with Angaza, you will need an account with Angaza that allows API access and ask for manufacturer credentials. AirLink supports creating devices in AirLink with payg_type = “Angaza” and will automatically create those devices in Angaza’s server. From then on, the token and credit expiry date from the Angaza server will be downloaded each time the device properties are updated. When the device reports it’s PAYG state, the payg_until_dt property will be updated to Angaza. In general, as long as the provisioning step is done right and the device generates any data, the flow should work transparently as for any other AirLink device.
Note that requests for new PAYG credit/tokens are done to the Angaza platform in this case and AirLink only supports synchronizing with the devices.
The process for Angaza PAYG is shown in the following video:
-
Credentials: For simplicity, the credentials required for a particular Angaza account's API access have been added to the json of the Angaza rule chain (the GitHub file has the development account credentials that need to be replaced with your own Angaza account's credentials). Look for the following in the Angaza rule chain .json file and edit it with your username (in place of airlink_nexus_demo) and password (in place of !2?6r*Cugq9Y) within the quotes, before uploading to the AirLink tenant:
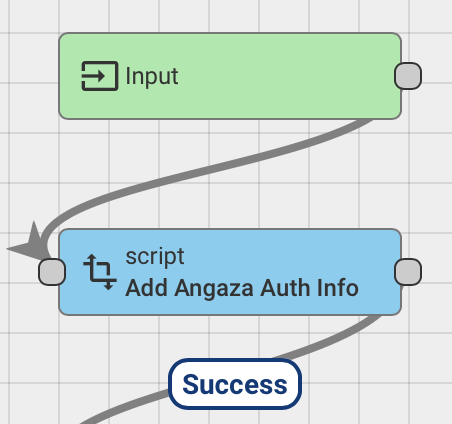
It can be edited after installation to your tenant by opening the "Add Angaza Auth Info" module in the Angaza rule chain from the server UI.
Note that only one Angaza credential is supported out of the box, which means that the functionality is best suited to a manufacturer. Further development of the airlink server is possible to support different device groups with different Angaza credentials if needed. 2. Provisioning:
-
To provision a single device to AirLink for use with the Angaza platform, use the AirLink App to provision the device and select payg_type as Angaza and Label as the serial number. The app and server will then automatically add this to your Angaza platform
-
For bulk provisioning devices, Please use a format like the following CSV file to add Angaza devices, so that they get properly created in the Angaza server. Don't worry if something goes wrong, you can always delete devices and start again:
-
-
PAYGO Tokens: Angaza devices use tokens for two reasons - for PAYGO credit, and for device-device commands on authorized paired devices. Both types of tokens can be exchanged using the AirLink flow, and hence AirLink effectively enables both Nexus Token and Nexus Channel functionalities. Whenever any activity happens on an Angaza device in the AirLink server e.g. saving a property value, it will download the latest PAYGO token from the Angaza server so that it is available to sync. Angaza does not push tokens to the AirLink server, so it is necessary to have device activity to pull the latest token. The easiest way to achieve this is to update a timestamp property via a 'POST' type command from the device or app, and then 'GET' the pc_tkn for the latest token pulled from the Angaza server. Note that the demo app can do this automatically.
- Telemetry Data: Telemetry forwarding to Angaza is not supported out of the box i.e. Device properties such as location sent from the device will be saved to the AirLink server, but will not be automatically forwarded to Angaza. This is because Angaza requires first a registration of a ‘data format’ to save device data, which needs to be done per manufacturer spec. There is a stub of the rule chain required for this interchange setup in the Angaza rule-chain, and can be edited per each manufacturer’s preference!